
| 일 | 월 | 화 | 수 | 목 | 금 | 토 |
|---|---|---|---|---|---|---|
| 1 | 2 | 3 | 4 | 5 | ||
| 6 | 7 | 8 | 9 | 10 | 11 | 12 |
| 13 | 14 | 15 | 16 | 17 | 18 | 19 |
| 20 | 21 | 22 | 23 | 24 | 25 | 26 |
| 27 | 28 | 29 | 30 |
- MSSQL
- 가재
- 분산 식별자
- for
- 반복문
- 조건문
- 구피
- Python 강좌
- 쌈채소
- 주말농장
- RSA
- rust
- 기본문법
- did
- Tendermint
- rust 강좌
- 카디날
- 체리새우
- rust 소개
- PKI
- 텐더민트
- 애플 달팽이
- 치비
- 분산 신원
- Feign
- golang 강좌
- MSA
- Config server
- 물생활
- 무화과
- Today
- Total
comnic's Dev&Life
[MSA]3. 마이크로 서비스 간 호출 #1 - Feign 본문
Java Version: 11, Spring Boot 2.1.4
[MSA]1. Config Server를 통한 설정 관리
[MSA]2. 메시지 브로커를 통한 설정값 관리
[MSA]3. 마이크로 서비스 간 호출 #1 - Feign
[MSA]4. 마이크로 서비스 간 호출 #2 - Ribbon
[MSA]5. Eureka를 통한 서비스 관리
지난 Config Server에 이어 각 서비스간 호출을 위한 Feign사용에 대해 알아보겠습니다.
먼저 시나리오(?)를 아래와 같이 하도록 하겠습니다.
1. 기존의 service-a에 새로운 UserController를 생성하고, User Name을 반환하는 [/getUserName] endpoint를 하나 추가 하겠습니다.
2. getUserName은 단순히 아래와 같은 JSON값을 리턴합니다.
{
    "result": "200",
    "msg": "ok",
    "username": "comnic"
}
3. service-b를 만들고 UserInfoController를 생성하고, User Info를 반환하는 [/getUserInfo] endpoint를 하나 추가 하겠습니다.
4. 이때 [/getUserInfo]는 service-a의 [/getUserName]를 호출하여 이름을 받아오고, 나머지 정보는 아래와 같이 하드코딩해서 사용하겠습니다.
{
    "result": "200",
    "msg": "ok",
    "user-name": [service-a]->getUserName(),
    "user-level": "Admin",
    "user-tel": "010-1234-1234",
    "user-id": "1234"
}
Step 1. service-a에 UserController Class 추가
간단하게 위에서 제시한 값을 JSON으로 출력하는 함수를 추가 하였습니다.
@RestController
public class UserController {

    @RequestMapping("/getUserName")
    public Map<String, String> getUserName(@RequestParam Map<String, String> params){
        Map<String, String> response = new HashMap<String, String>();

        response.put("result", "200");
        response.put("msg", "ok");
        response.put("username", "comnic");

        return response;
    }
}
Step 2. service-b Project 생성
이제 service-a Project를 생성할 때와 동일하게 service-b를 생성합니다. 추가 적으로 아래와 같이 Feign과 Ribbon를 추가 합니다.
(Ribbon은 다음에 다룰 것입니다.)
1. Dependencies 설정 및 추가
- Cloud Routing / Feign
- Cloud Routing / Ribbon
2. application.properties 설정 추가
service-a와 구분을 위해 Port를 8090으로 합니다.
server.port=8090그리고,
아래 처럼 Application Class에 @EnableFeignClients("com.comnic.msa.serviceb")를 추가 해 줍니다.
@EnableFeignClients("com.comnic.msa.serviceb")
@SpringBootApplication
public class ServiceBApplication {

    public static void main(String[] args) {
        SpringApplication.run(ServiceBApplication.class, args);
    }

}
Step 3. service-b에 userServiceProxy Interface 생성
이제 다른 서비스를 호출 할 때 사용할 interface를 하나 만들어 줍니다. @FeignClient 어노테이션을 사용해 아래와 같이 만들어 줍니다.
@FeignClient(name="service-a", url="localhost:8080")
public interface UserServiceProxy {
    @RequestMapping(value = "/getUserName", method = RequestMethod.GET)
    public Map<String, String> getUserName();
}
자, 이제 준비는 모두 끝이 났습니다. 간단하죠!?
정리하면,
@EnableFeignClients와 @FeignClient 어노테이션만 설정해 주시면 됩니다.
Step 4. service-b에 UserInfoController Class 생성
위에서 준비한 Feign을 이용해 다른 서비스를 호출하고 결과 값을 출력하는 클래스와 메소드를 만들어 보겠습니다.
먼저, UserInfoController Class를 생성하고, @RestController 어노테이션을 주고, 위에서 만든 UserServiceProxy 인터페이스를 @Autowired 어노테이션으로 주입하고 합니다.
그리고, 아래와 같이 getUserInfo() 메소드를 만들어 줍니다.
@RestController
public class UserInfoController {

    @Autowired
    private UserServiceProxy userServiceProxy;

    @RequestMapping("/getUserInfo")
    public Map<String, String> getUserInfo(@RequestParam Map<String, String> params){
        Map<String, String> response = new HashMap<String, String>();

        Map<String, String> userNameInfo = userServiceProxy.getUserName();

        response.put("result", "200");
        response.put("msg", "ok");
        response.put("user-name", userNameInfo.get("username"));
        response.put("user-id", "1234");
        response.put("user-level", "Admin");
        response.put("user-tel", "010-1234-1234");

        return response;
    }

}
간단하게 중간에 보시면,
Map<String, String> userNameInfo = userServiceProxy.getUserName();
이렇게 타 서비스를 호출하고 결과 값을 받아 올 수 있습니다.
Step 5. Test
service-a와 service-b를 모두 구동하고 테스트를 해 보겠습니다.
먼저 service-a(http://localhost:8080)의 /getUserName이 잘 작동하나 확인 합니다.
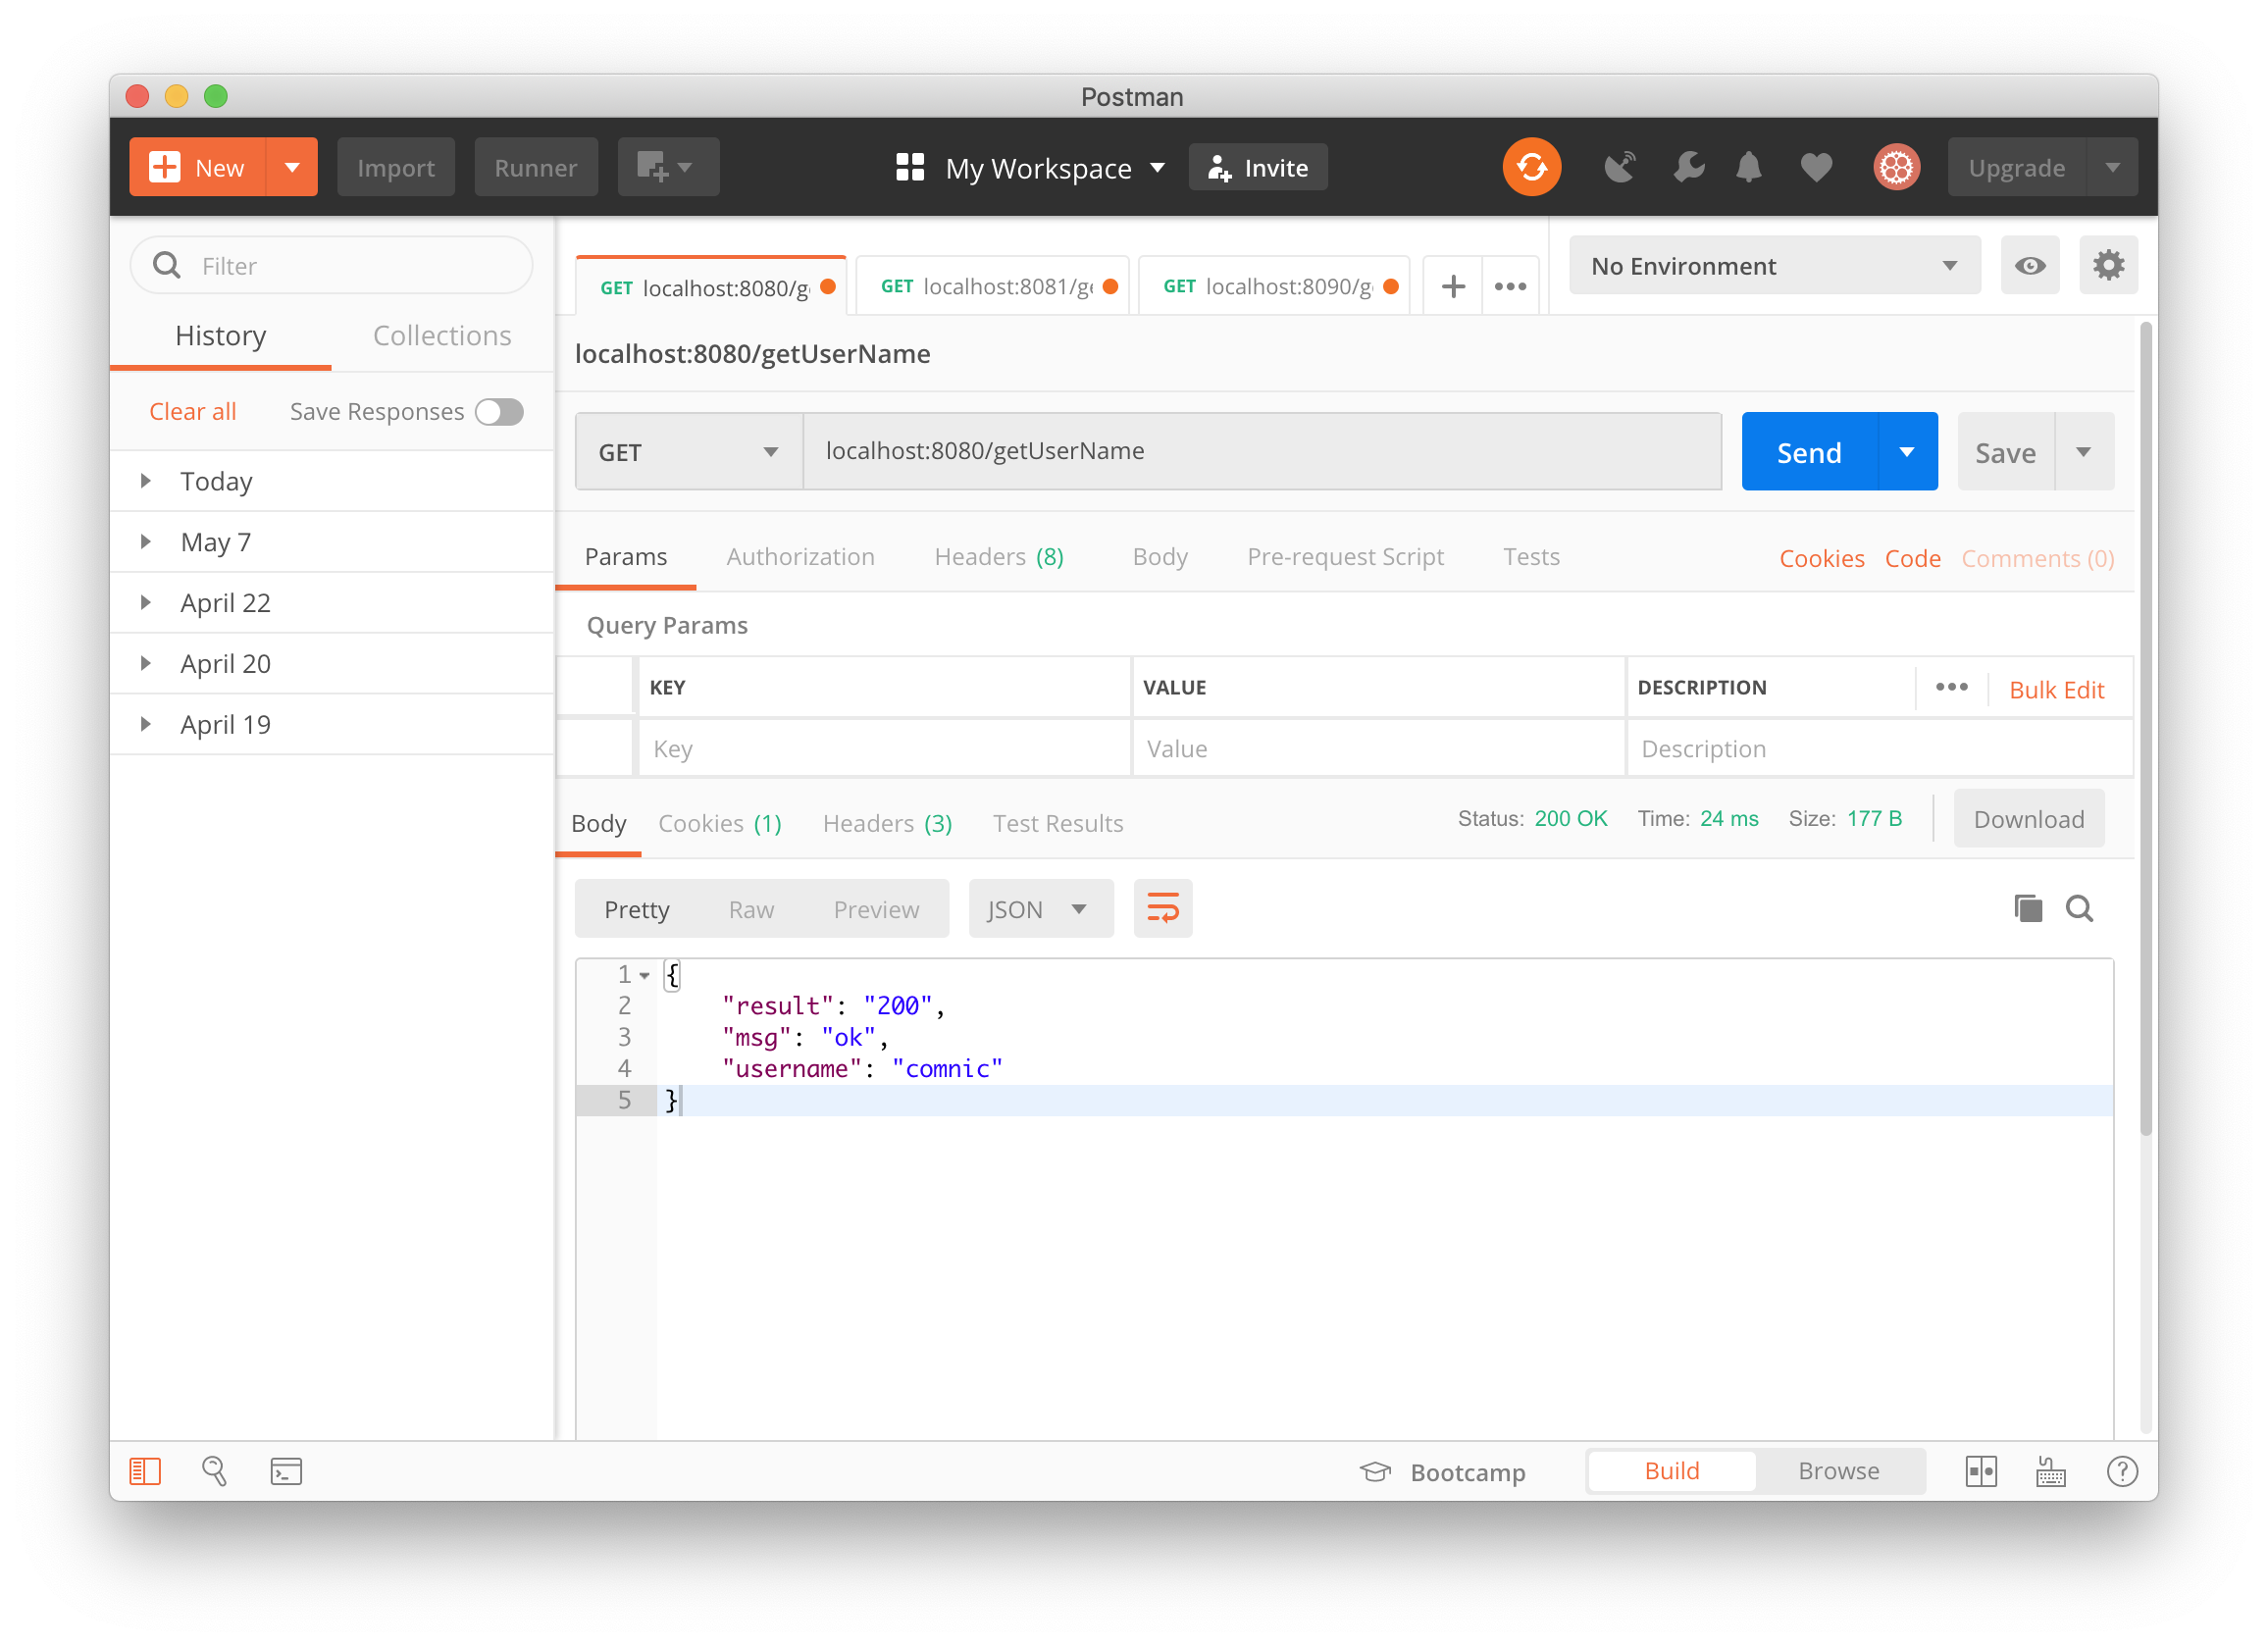
위 처럼 결과가 잘 나타나면 service-b(http://localhost:8090)의 /getUserInfo를 테스트 해 봅니다.
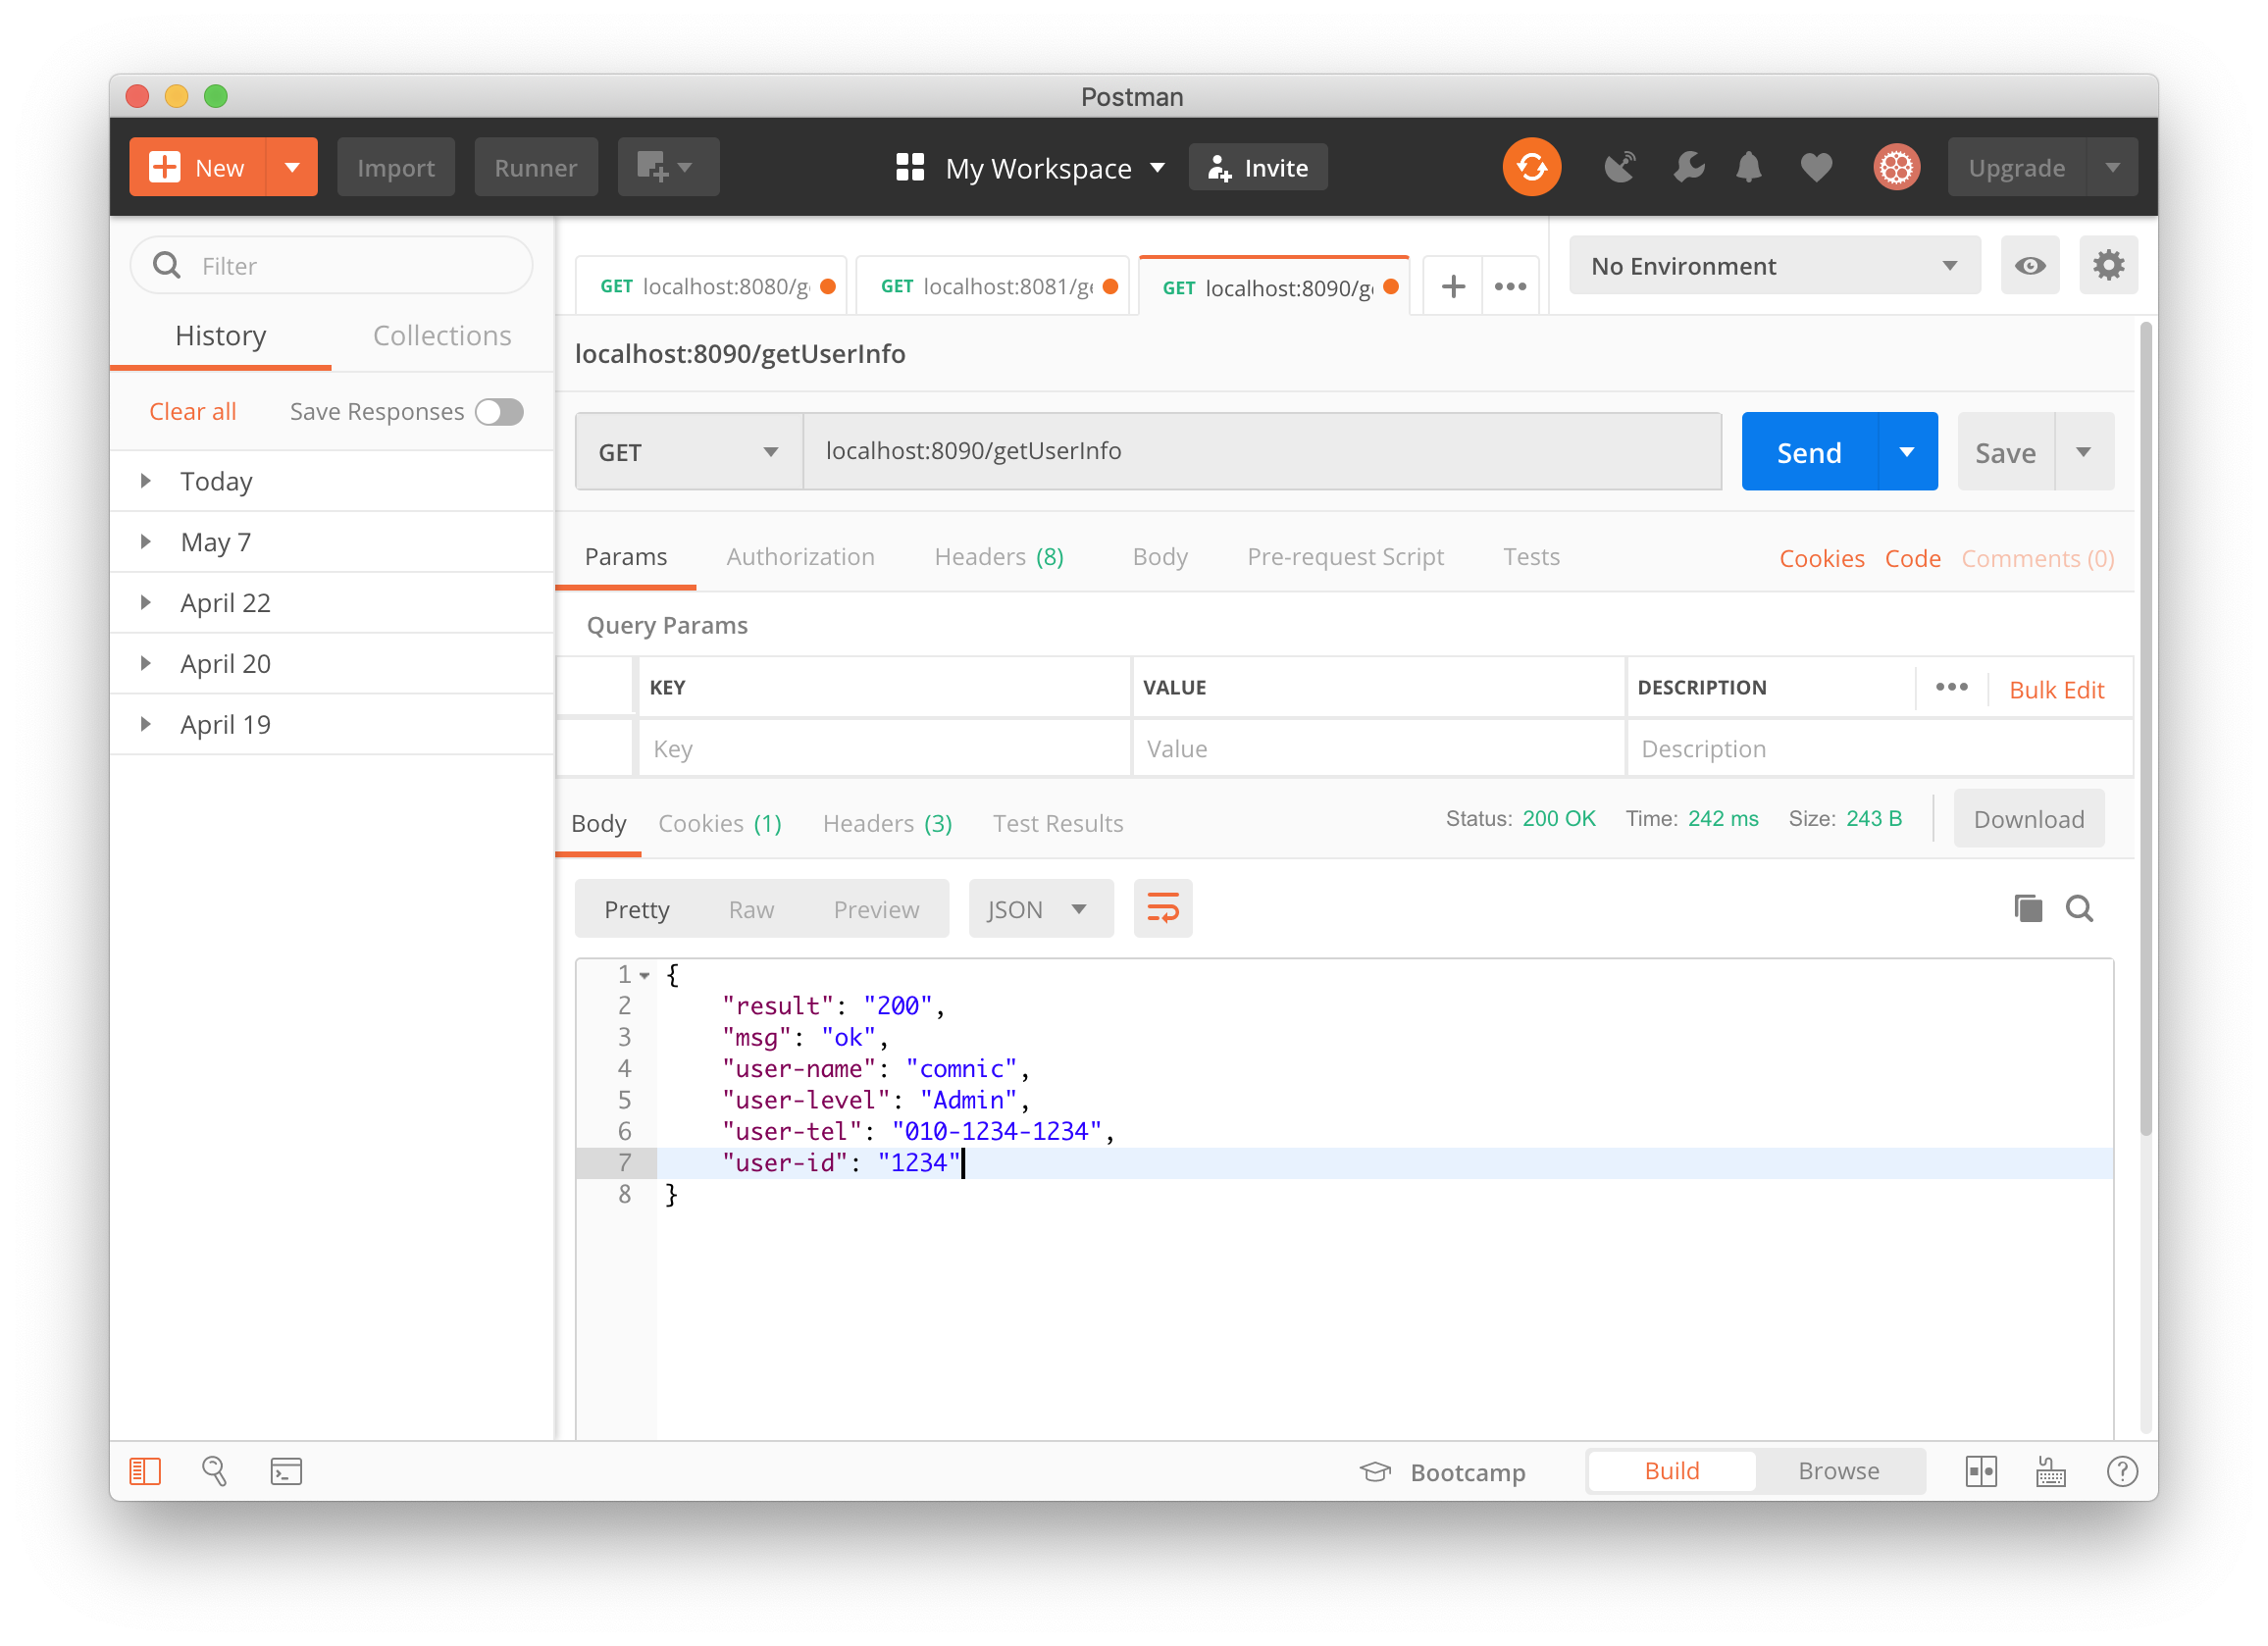
위 처럼 user-name부분에 service-a의 결과 값이 잘 들은 간 것을 볼 수 있습니다.
보셨던 것 처럼 쉽게 다른 서비스를 호출하고 결과값을 받아 사용할 수 있습니다. 다음은 클라이언트 측 로드밸런싱이 가능한 Ribbon를 이용해 service-a를 2개 띄워 놓고 호출하는 과정을 살펴보도록 하겠습니다.
[MSA]1. Config Server를 통한 설정 관리
[MSA]2. 메시지 브로커를 통한 설정값 관리
[MSA]3. 마이크로 서비스 간 호출 #1 - Feign
[MSA]4. 마이크로 서비스 간 호출 #2 - Ribbon
[MSA]5. Eureka를 통한 서비스 관리
'MSA(MicrosofService Architecture)' 카테고리의 다른 글
| [MSA]5. Eureka를 통한 서비스 관리 (0) | 2019.05.19 |
|---|---|
| [MSA]4. 마이크로 서비스 간 호출 #2 - Ribbon (0) | 2019.05.17 |
| [MSA]2. 메시지 브로커를 통한 설정값 관리 (0) | 2019.04.20 |
| [MSA]1. Config Server를 통한 설정 관리 (0) | 2019.04.19 |


